

I promised you a Doctor Who Apidose Plushie tutorial and I’m going to DELIVER! This tutorial is based on Erica Kern’s tutorial but made easier for those who don’t have a sewing machine or don’t want to use a sewing machine with teens. I may try her tutorial some day because it’s adorable and really professional looking, but for the teen room I went with easy.
Here we go! You will need:
-white polar fleece (I got like 1 1/2 yards and have a TON left)
-sewing needles
-white embroidery floss or thread
-black embroidery floss
-poly fill or some other stuffing
-black beads for eyes
-paper template
Step One: Freehand an adipose template. Or download a picture of one and trace the outline onto some construction paper or cardstock.
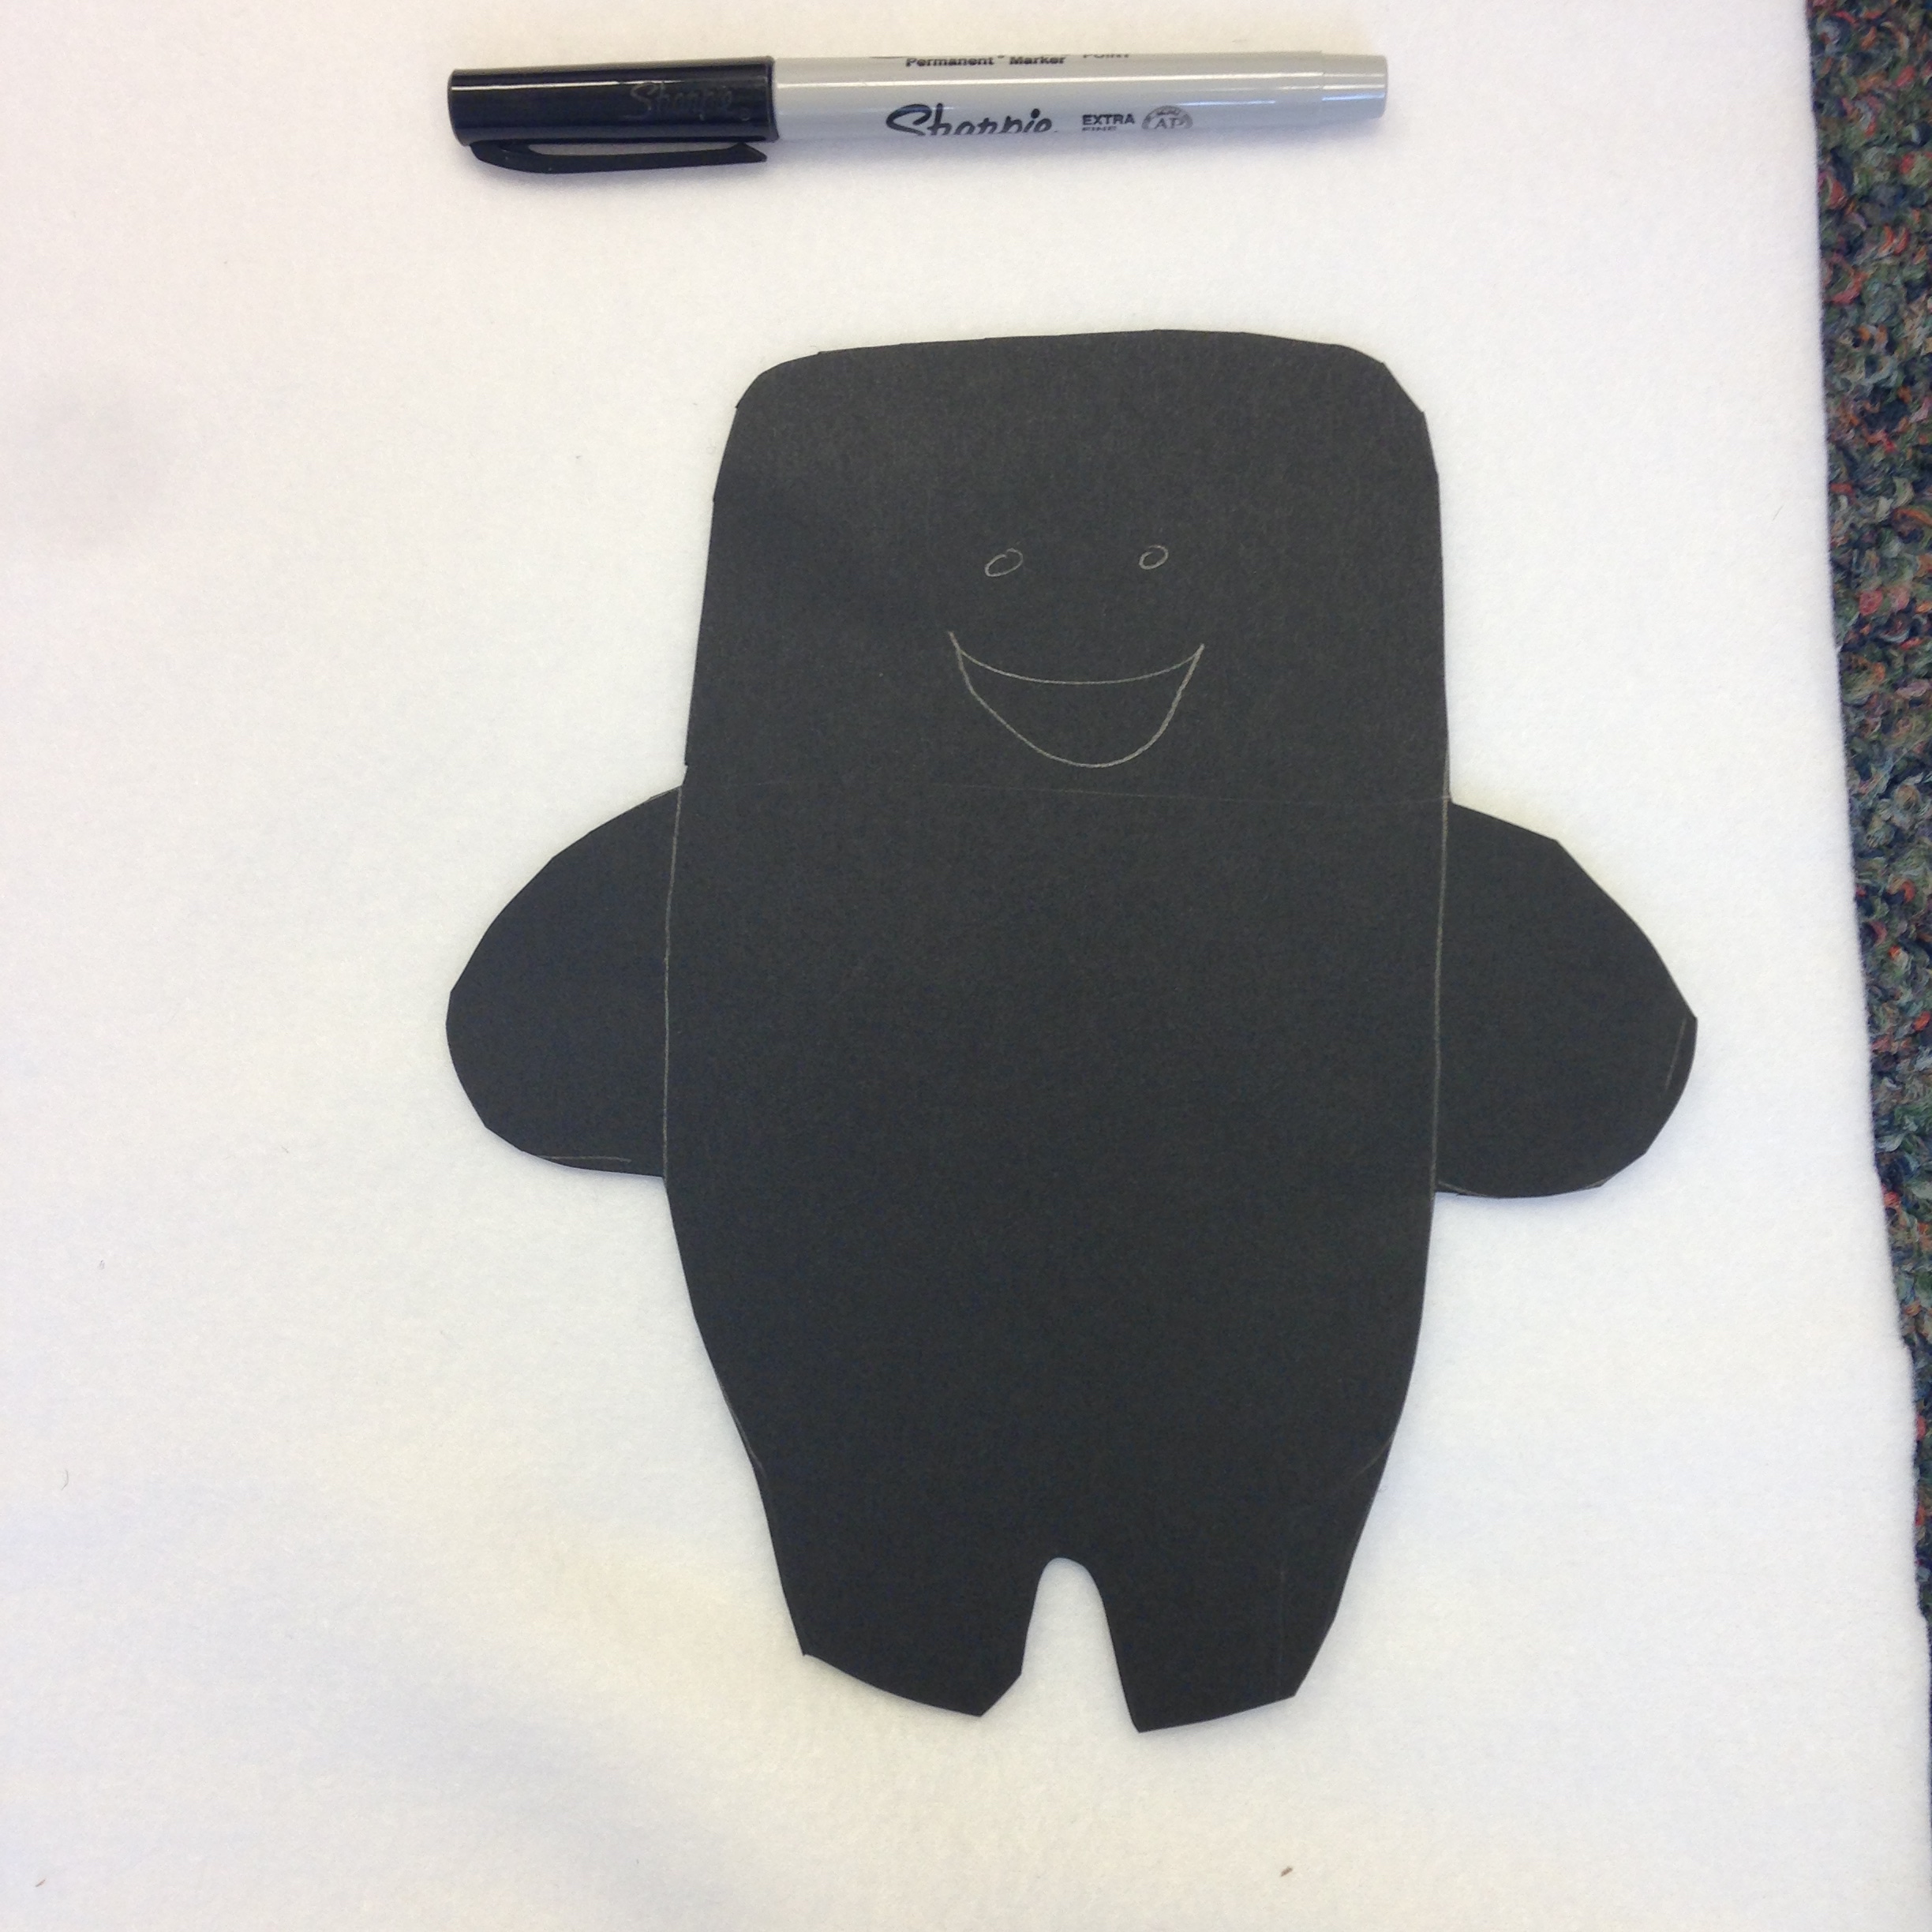
Step Two: Place your template on your fleece that is still folded together. Trace the template with a fabric marker or . . . a Sharpie because you are at work and forgot a fabric marker!
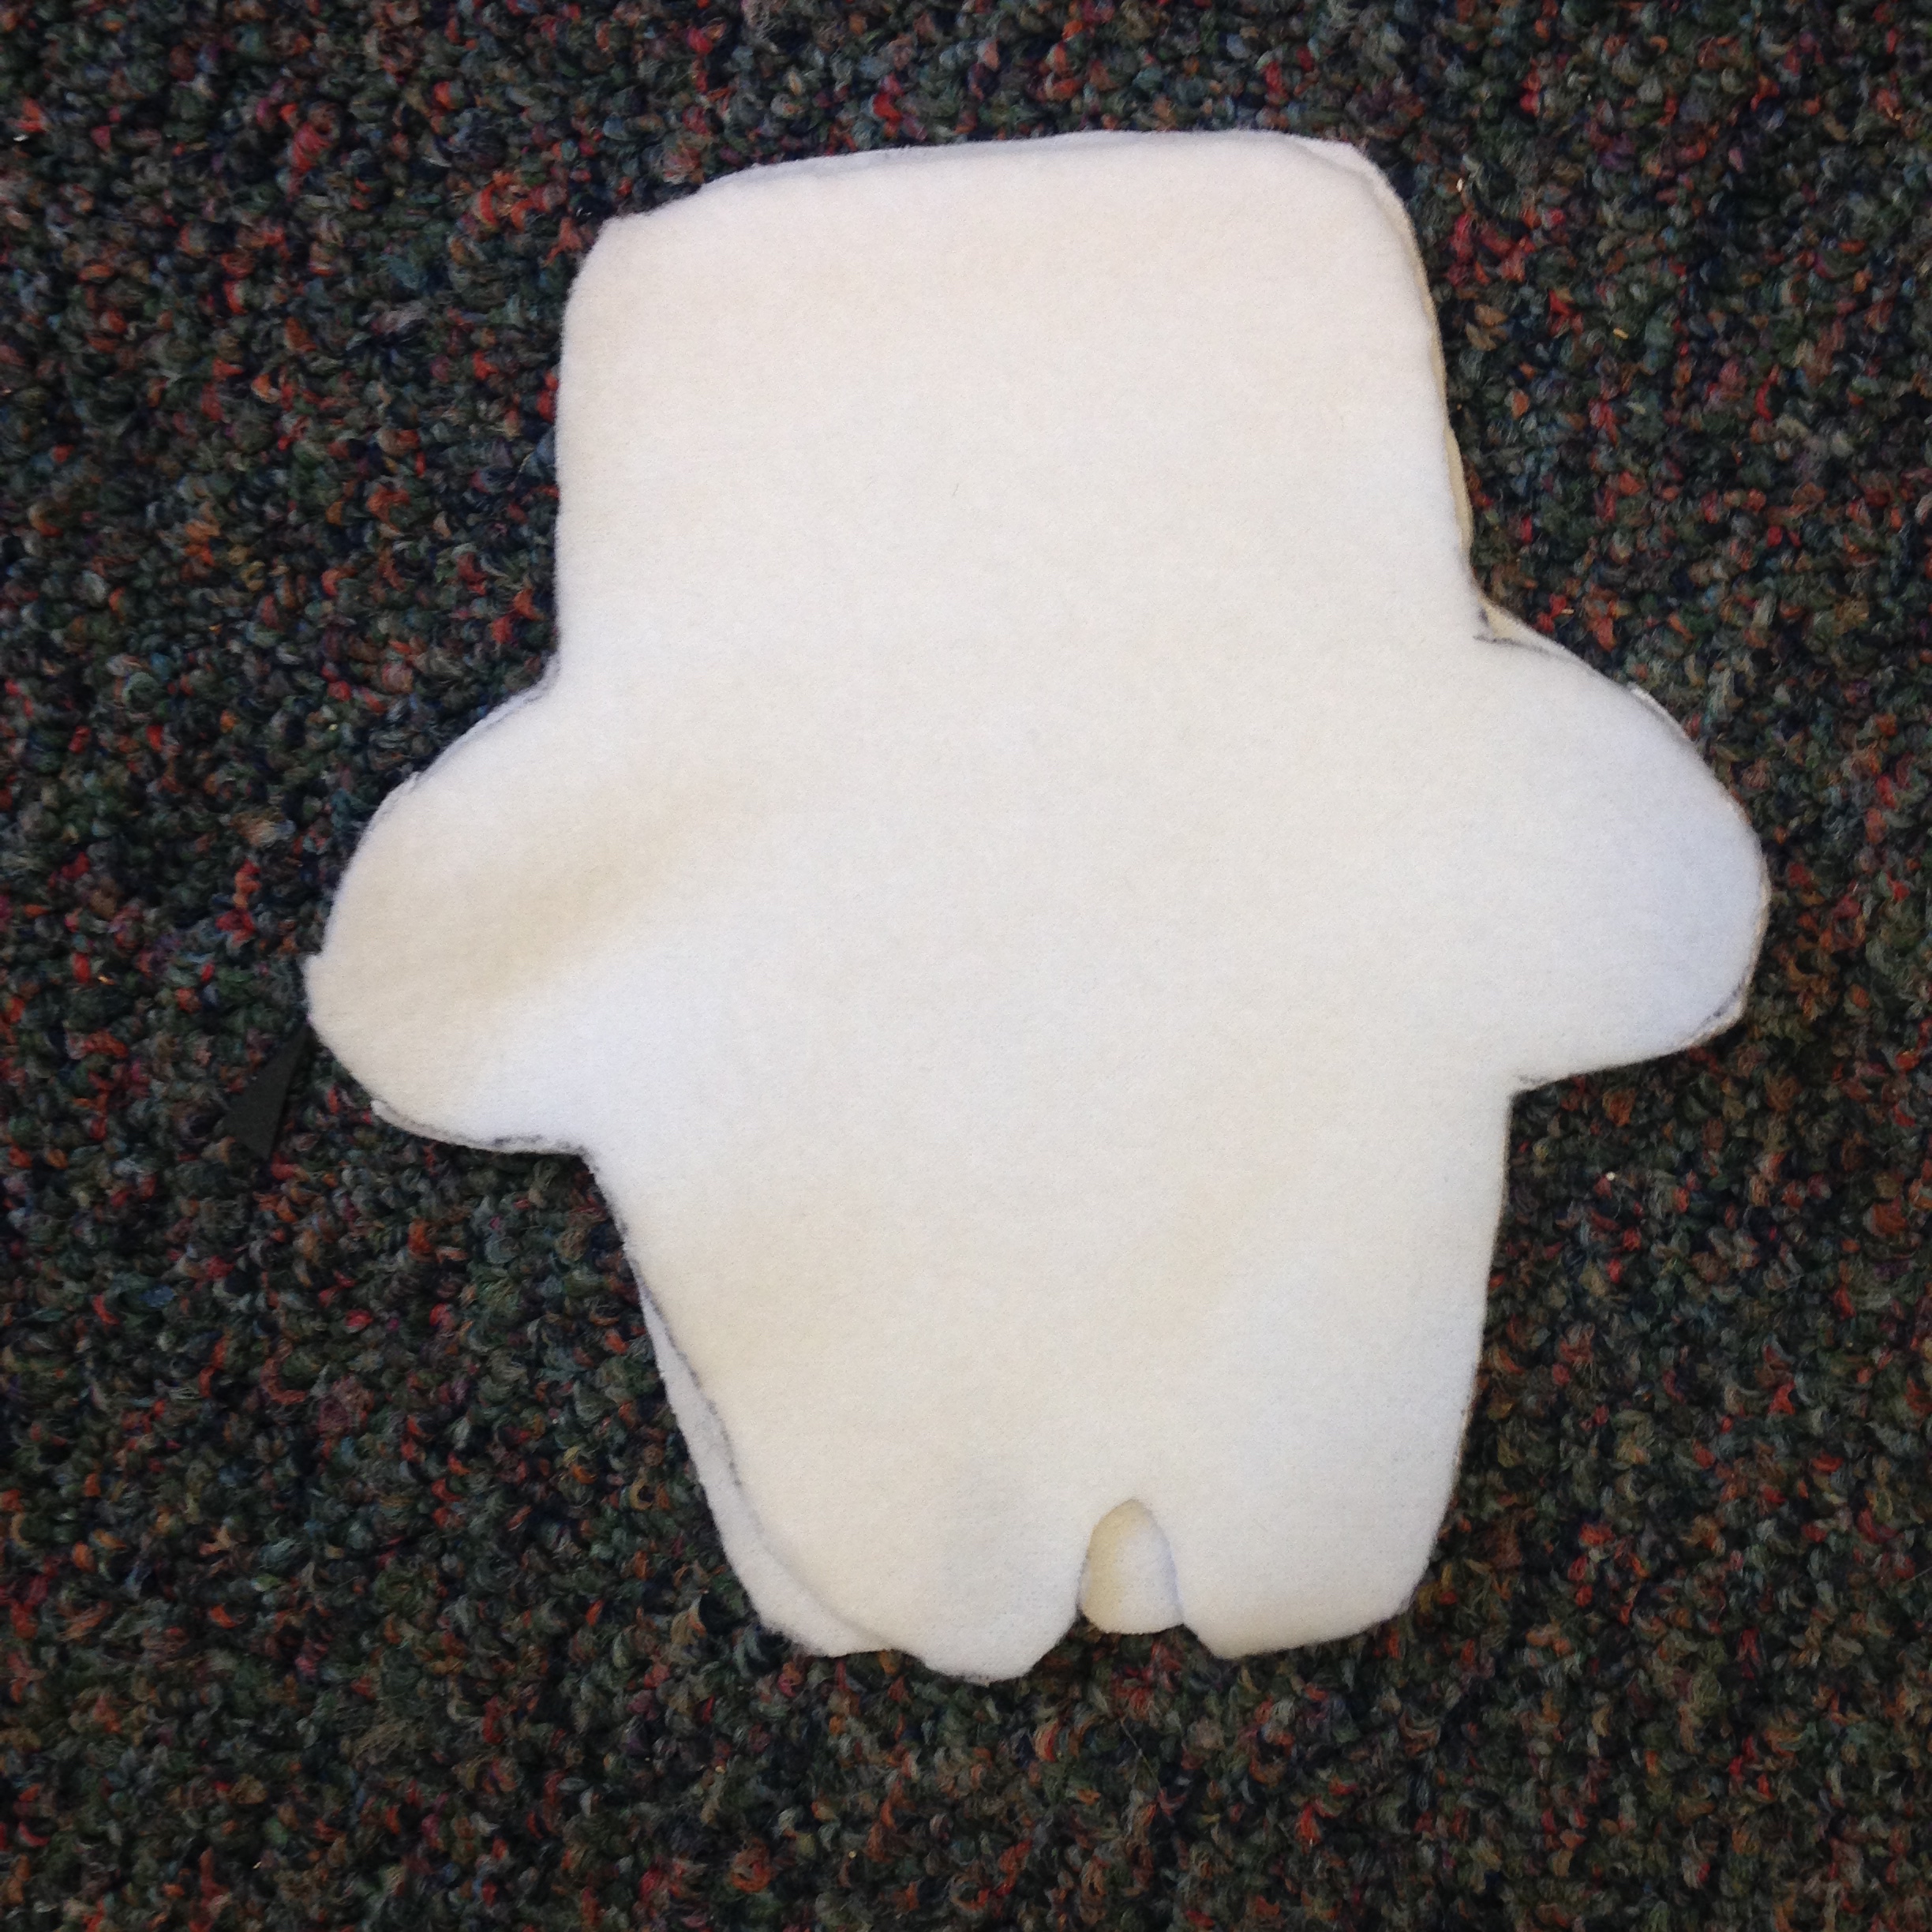
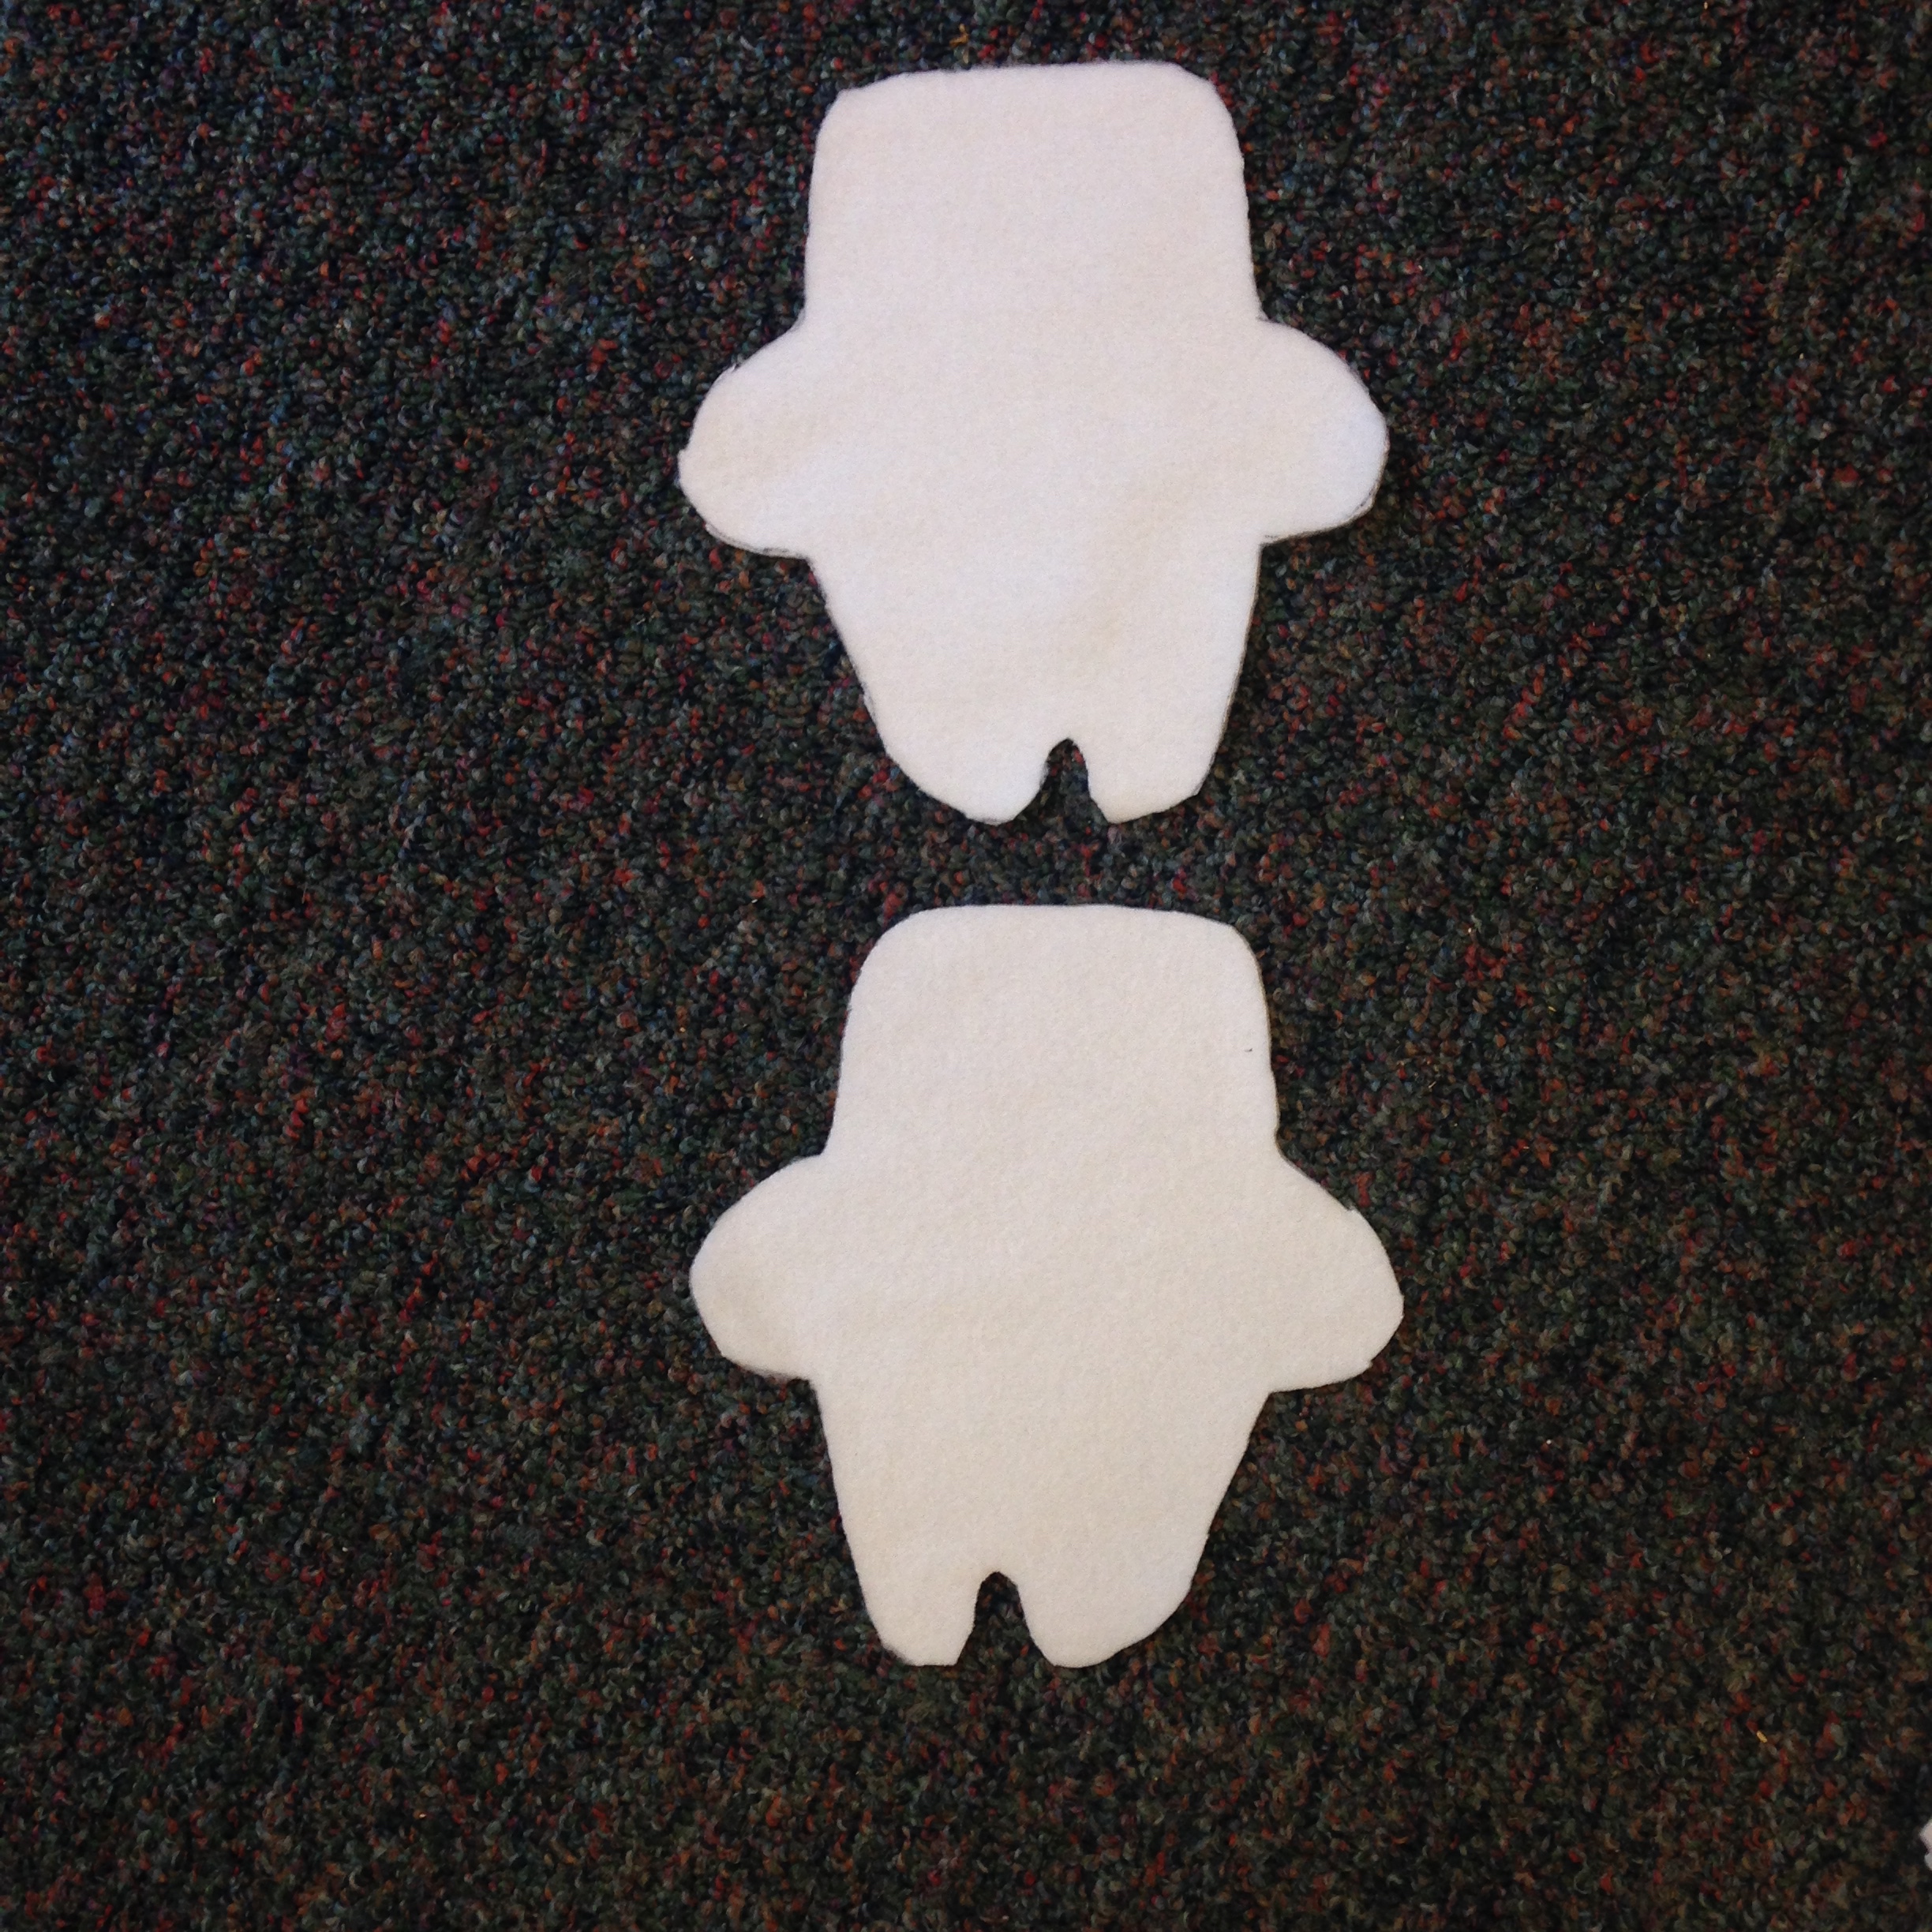
Step Three: Cut out the template making sure you’re holding the folded fabric together. That way you will get two fabric pieces that are the same shape/size.
Step Four: Mark spots for the eyes and mouth on one fabric piece. Sew on the eyes with black beads and black thread.

Step Five: Sew on the mouth with a straight stitch or whatever fancy stitch you know that can make a smile with the black thread. (Can you tell I’m not an embroidery expert?)
Step Six: Whip stitch the two pieces together almost all the way around. Leave the top of the head open.

Step Seven: Stuff it with poly fill! Make sure you get into the legs and arms. Stitch it up some more, leaving about an inch open.
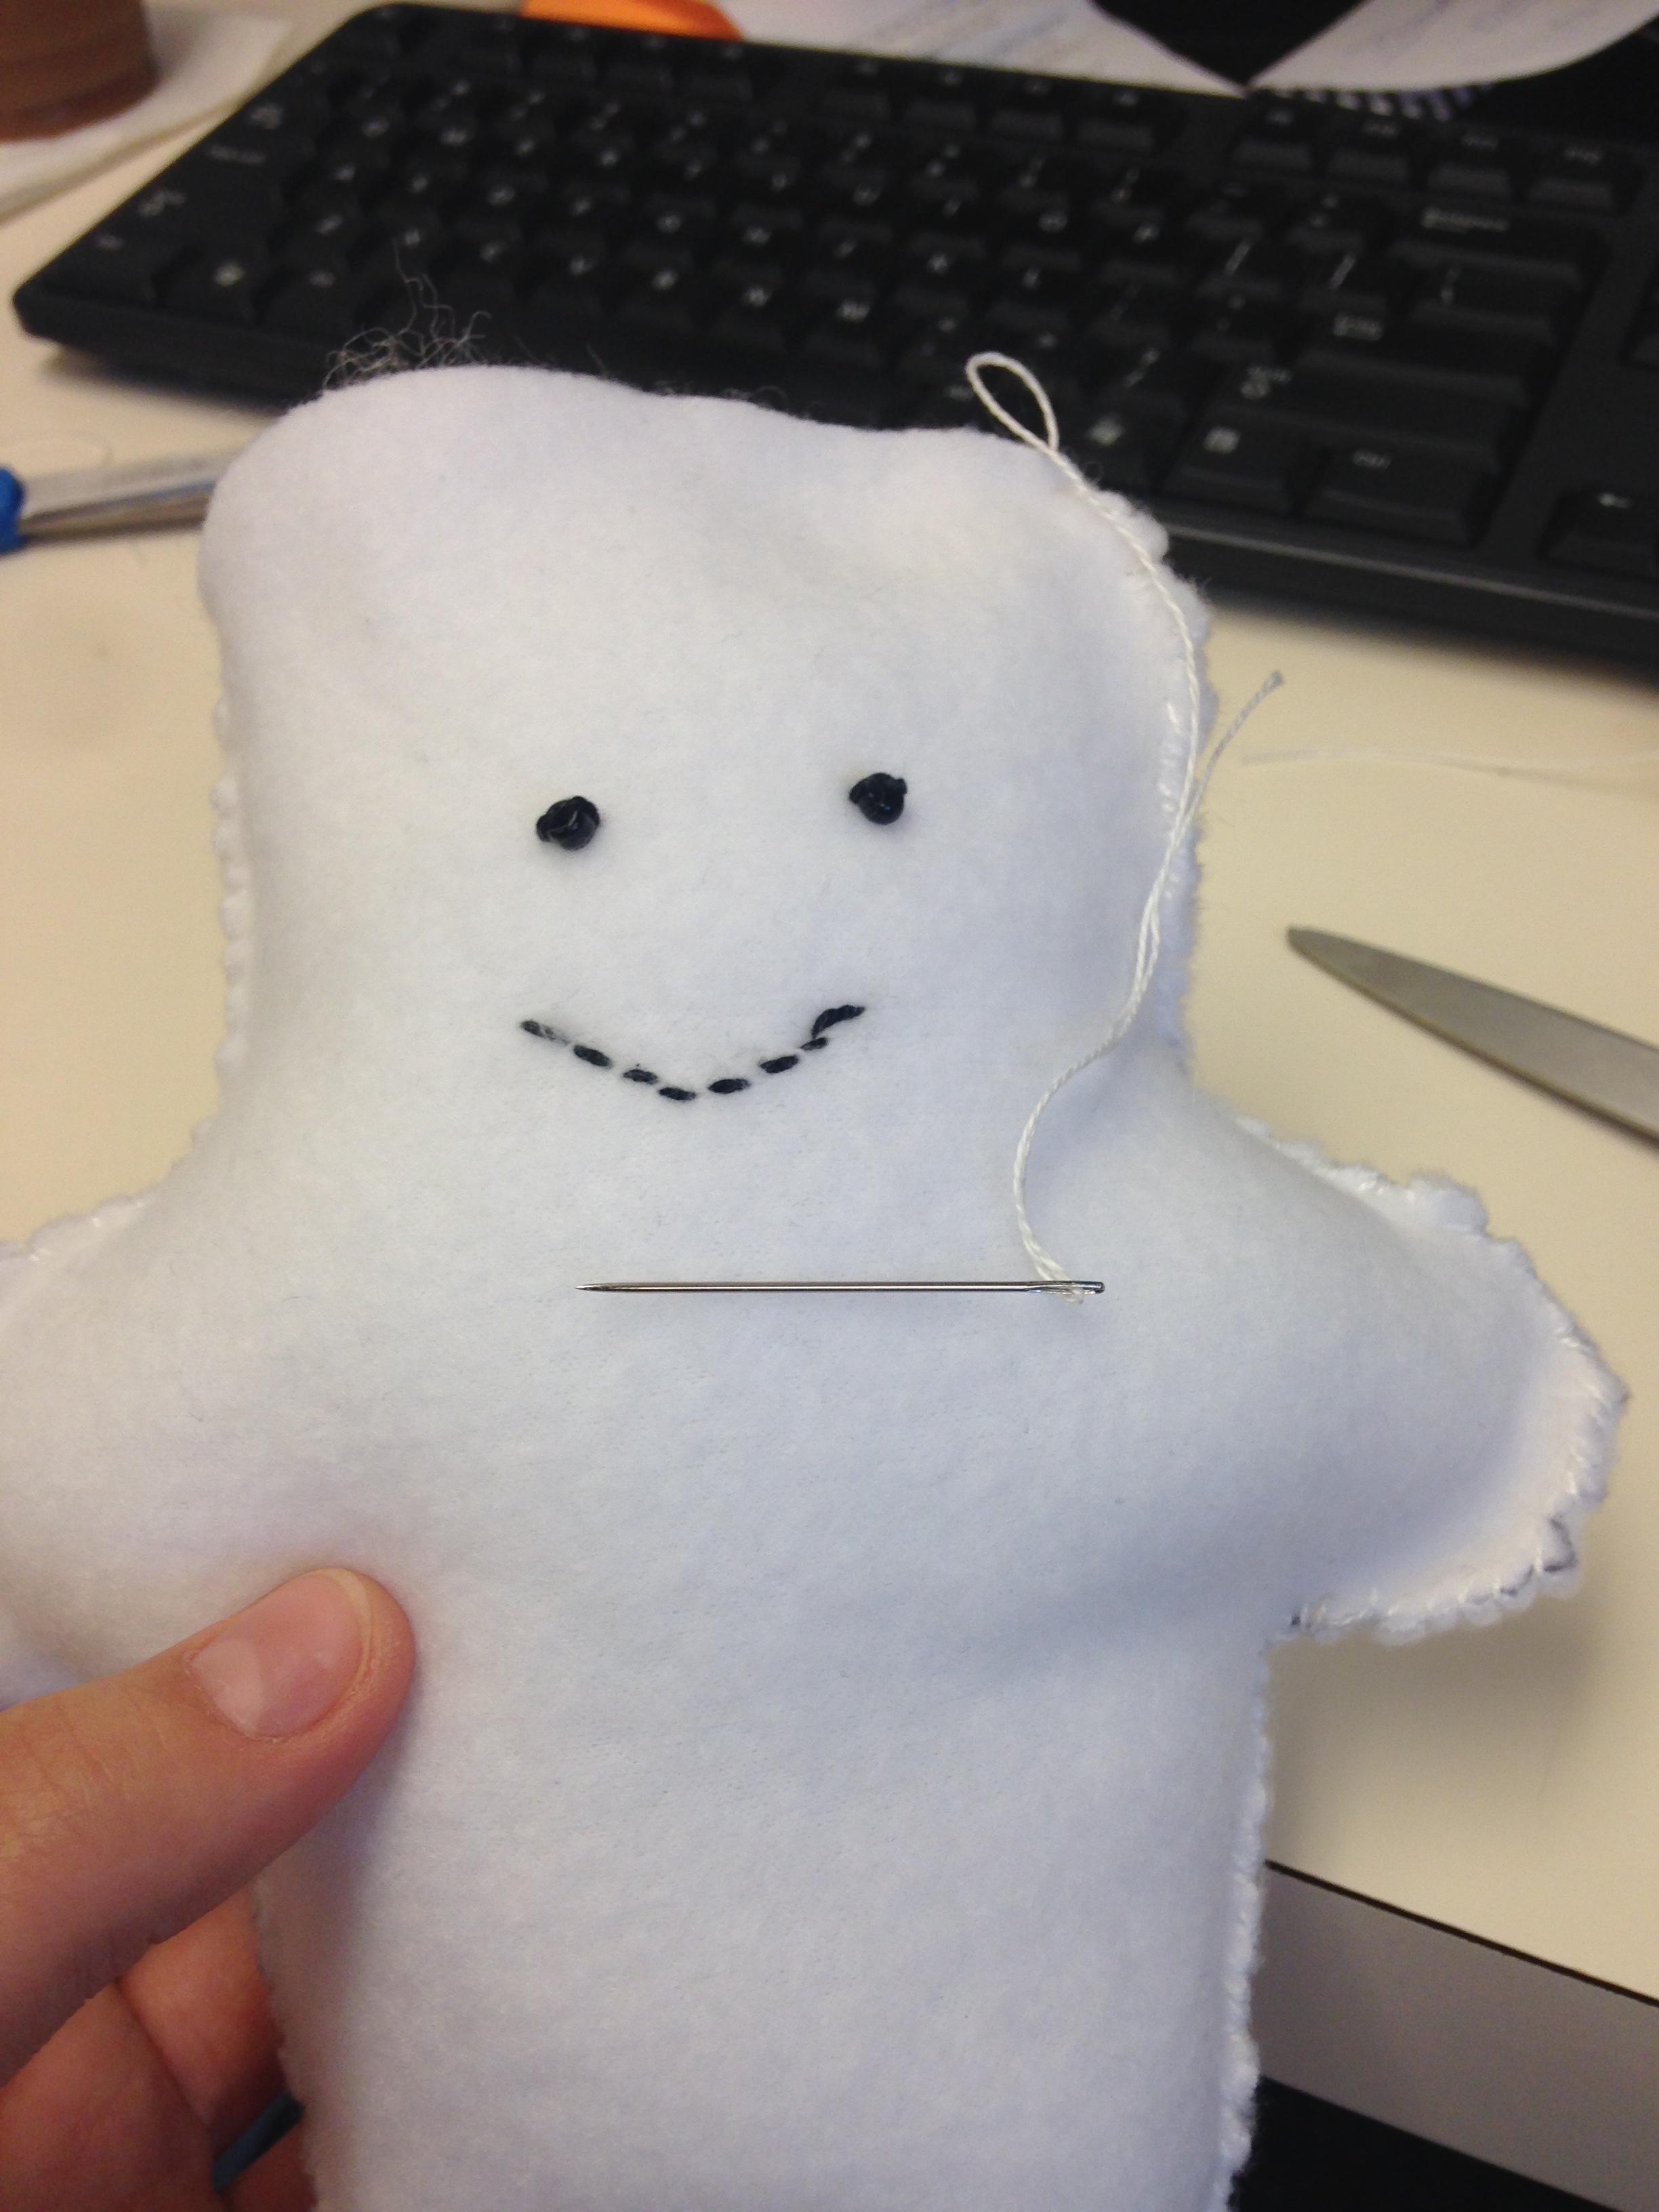
Step Eight: Do a final stuffing to make sure you have the fullness you want and then stitch up the opening and tie off your string.
Step Nine: Admire your handiwork!
TA-DA! You’ve made an easy and cute Adipose. You can see some of the adventures that the adiposes the teens made had in the library on our Instagram feed.
Any cute crafts you want to share? I’m always looking for ideas!
